Working with CEGC horizontal directional drilling machines on unstable terrain presents significant hazards. Machines can overturn or slide, endangering personnel. A Drill Rig Grip Anchor Beats Unstable Terrain by providing essential stability. These anchors are crucial, and multiple units are often required. Proper installation of ground anchors is key. This guide will help you select, install, and maintain them. These ground anchors ensure stability. More anchors are needed for challenging ground conditions. Strong ground anchors maintain steadiness. These anchors are paramount for safety. Increased anchor usage enhances the safety of your work, regardless of the terrain. These anchors are vital for your operations.
Key Takeaways
-
Drill rig grip anchors are very important. They keep drilling machines steady on bad ground. This stops accidents and keeps workers safe.
-
You must pick the right anchors for the ground. You also need to put them in correctly. This makes sure they work well and keep things safe.
-
Always check and take care of your anchors. This helps them last longer. It also makes sure they always keep your drilling safe and steady.
Understanding Unstable Terrain for Drill Rigs
Identifying Common Unstable Ground Conditions
You must know the ground conditions. This is for a horizontal directional drilling machine. Drilling a borehole removes soil support. This puts stress on nearby soil. Bigger boreholes mean more collapse risk. Weak layers can cause cracks. This lets drilling fluid escape. Losing fluid pressure can soften soil. This can collapse the borehole. Loose sand or gravel-sand is a big problem. They make borehole wall stability hard. A collapsed borehole can trap drill rods. A fractured borehole can release drilling fluids. You must figure out fluid pressures. This prevents these issues. If no filter cake forms, fluid drains fast. This happens in loose sands. This quickly lowers pressure on soil particles. This can cause liquefaction. It makes ground conditions crumble. Research looks at soil collapse. It also looks at hydraulic fracturing. This is from high drilling mud pressure. Wang and Sterling (2007) found something. Mud filtering into loose sand raises pore pressure. This lowers effective stresses. It causes liquefaction. It also causes borehole instability. A good geotechnical assessment helps you prepare. It checks site conditions.
Risks of Unanchored Drill Rig Operations
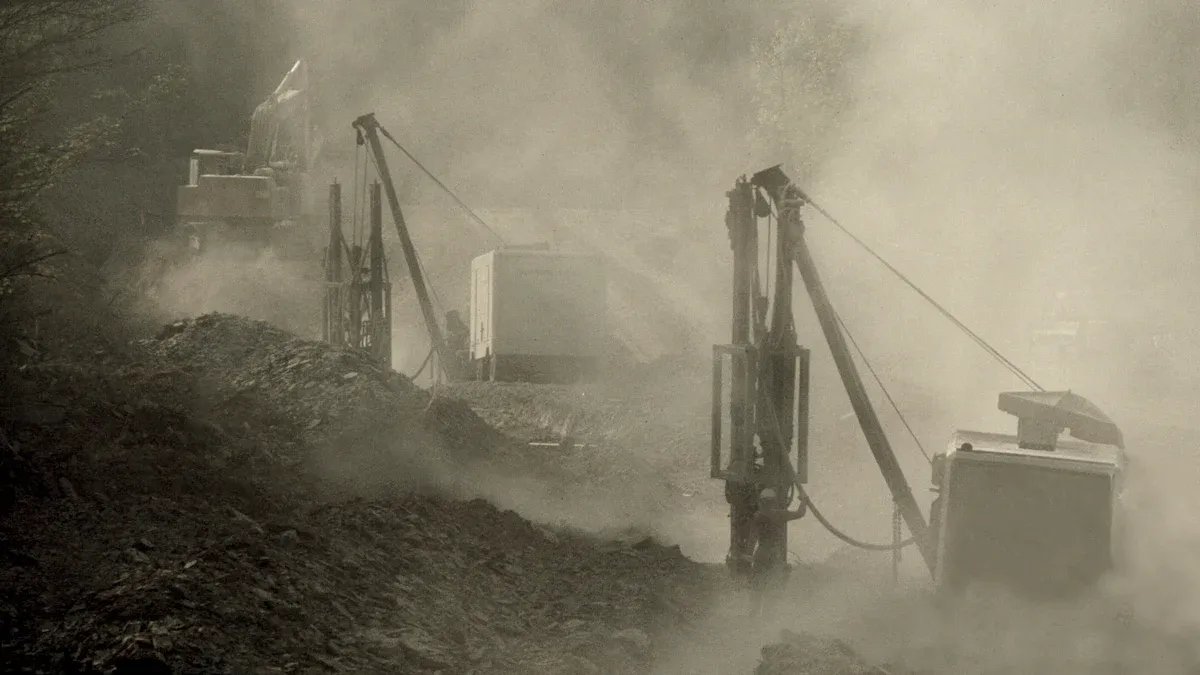
Operating unanchored drill rigs is risky. This is on unstable ground. Your equipment can tip over. It can also slide. These dangers cause bad accidents. The rig might flip. It might move suddenly. This puts people and gear in danger. Such events cause costly delays. They can also cause injuries. You must put safety first. This avoids these problems.
The Role of Grip Anchors in Risk Mitigation
Anchors are very important here. Ground anchors provide needed resistance. They stop your drill rig from tipping. They also stop it from sliding. Good ground anchors keep your equipment steady. You need many anchors for tough ground. These anchors spread the weight well. They make a strong base for your work. Buying good ground anchors makes things safer. A drill rig grip anchor beats unstable terrain. It gives strong support. These anchors are not just extras. They are key tools. They give you the stability you need. This helps with successful drilling. You depend on these ground anchors. They keep your project on track. Always use the right anchors. This is for your specific ground conditions. These anchors protect you first. Strong ground anchors save your investment. You must pick the right anchors. This is for every job. Good ground anchors make a big difference.
Types of Drill Rig Grip Anchors and Their Use
Overview of Common Anchor Types
You need to know about different anchors. Each type of ground anchors offers unique support. Screw anchors twist into the soil. Plate anchors are flat. They are buried. Rock anchors use grout. They bond with rock. Deadman anchors are buried objects. Self-Drilling Anchors (SDAs) are very important. These self-drilling rock bolts drill and grout. They do this in one step. They are excellent for slope stability. They reinforce foundations. They distribute load. This is in loose or fractured soil. Rock bolting is another method. It anchors unstable rock formations. You choose anchors based on your design needs.
Matching Anchors to Terrain Conditions
Matching anchors to ground conditions is crucial. Different ground anchors work best. This is in specific terrains. For sand and mud, Danforth anchors are ideal. They dig in well. Plow anchors are useful. This is in sand, muck, and clay. They struggle in hard, rocky bottoms. Mushroom anchors work best. This is in soft, muddy bottoms. Grapnel anchors are great. This is for rocky areas. Their shape hooks onto objects. Rocna anchors offer unmatched versatility. They set well in all bottom types. Fluke anchors excel. This is in mud or sand. Claw anchors grab into many materials. This includes coral, rock, and sand. They do not hold well. This is in hard clay or grass. Your design must consider these factors.
Advantages and Limitations of Each Anchor
Each anchor design has pros and cons. Screw anchors are quick to install. They are good for temporary support. Plate anchors offer strong support. This is once buried. SDAs, or self-drilling rock bolts, are efficient. They combine drilling and grouting. This makes them good. This is for difficult ground conditions. They are often used. This is as permanent anchors. Temporary anchors are removed after use. Permanent anchors stay in place. Temporary ground anchors are cost-effective. This is for short projects. Permanent ground anchors provide long-term stability. You must choose the right design. This is for optimal performance. Many anchors are available. You need to pick the best ground anchors for your job.
Pre-Installation Planning for Effective Anchoring
Good anchoring starts early. You need careful planning. This keeps your drill rig steady. These steps are very important for safety.
Site Assessment and Geotechnical Investigation
You must know your work area. Do a full geotechnical investigation. This shows the ground conditions. It finds soil types and their strength. This helps you pick the right anchors. It also guides your design. You learn about problems at the site conditions.
Determining Anchor Load Requirements
You need to know the force your anchors must hold. Many things decide the needed load for your ground anchors:
-
Bolt Diameter and Anchorage Length: Bigger bolts mean more contact. Longer
anchorsspread the load better. -
Shear Strength of the Surrounding Ground: Stronger ground grips better. This makes it stronger.
-
Grouting Pressure: This helps grout stick to the ground. It makes more friction.
-
Anchor Bar Wall Thickness: Thicker walls handle more stress. They bend less.
-
Material Quality and Composition: Strong metals work best. They do not rust easily.
-
Installation and Craftsmanship: Good installation helps
performance. Accurate drilling and even grouting are key. -
Environmental Conditions: Water, heat, and shaking affect strength. They can harm grout.
Calculating Anchor Spacing and Pattern
After knowing the load, you figure out spacing. You also plan the pattern for your anchors. This gives even support. Good spacing stops too much stress. It makes your ground anchors work best. This design is vital for stability.
Regulatory Compliance and Safety
You must follow all rules. Many drill rig accidents happen. They come from bad platforms. They also come from wrong equipment use. This breaks company rules. Efforts fix these dangers. They use ANSI/ASSP rules and checks. This stops big accidents. It keeps workers and people safe.
-
Ground Anchors: You mustdesignpermanent ground anchors. They need to work all year.Temporary ground anchorsneed pull testing. This is before first use. They also need yearly testing. Re-testing is needed after season changes. -
Guylines: Derrick guylines must connect to good
ground anchors. Install them as the maker says. A professional engineer'sdesignor API Recommended Practice RP 4G-1992 also applies. The maker's rules for guylines must be clear. They should be on the derrick. Or they should be posted at the rig. -
Documentation: The main builder makes sure papers are on site. This proves
ground anchorsmeet rules. Signatures from the person in charge are needed. -
Emergency Escape Systems: Derricks need a safe escape line. It must be anchored. This line must be at least 13 mm (1/2 in) wide. It should be twice the length of the height. It must hold 13.3 kN (3,000 lbs). Keep it clear of things. These are key steps for your
temporary anchorsandpermanent anchors. You need to test alltemporary anchorsandpermanent anchorsoften.
Installing Drill Rig Grip Anchors on Unstable Terrain
Installing anchors correctly is important. It is as important as choosing the right ones. Proper installation makes your drill rig grip anchor beats unstable terrain. It gives you the stability you need. These key steps in installing ground anchors stop problems. They keep your work safe.
Preparing the Anchor Site
You must get the site ready. Do this before you install any anchors. This preparation helps with strong support.
-
Inspect and Select Anchors: Look at all refractory anchors. Check for flaws. Look for damage or wear. Pick the right type and size. Base this on your needs. Think about how they will be used.
-
Clean and Prepare the Surface: A clean surface helps things stick. Remove dirt and old material. Use a wire brush. Make sure the surface is clean and dry. It must be free from dirt.
-
Plan Anchor Placement and Spacing: Plan carefully. This gives even support and stability. Follow the maker's advice. This is for spacing and placement. It helps get the right properties. Do not put too many close together. Avoid uneven placement. This stops hot spots. It prevents early failure. This careful design makes your ground anchors work well.
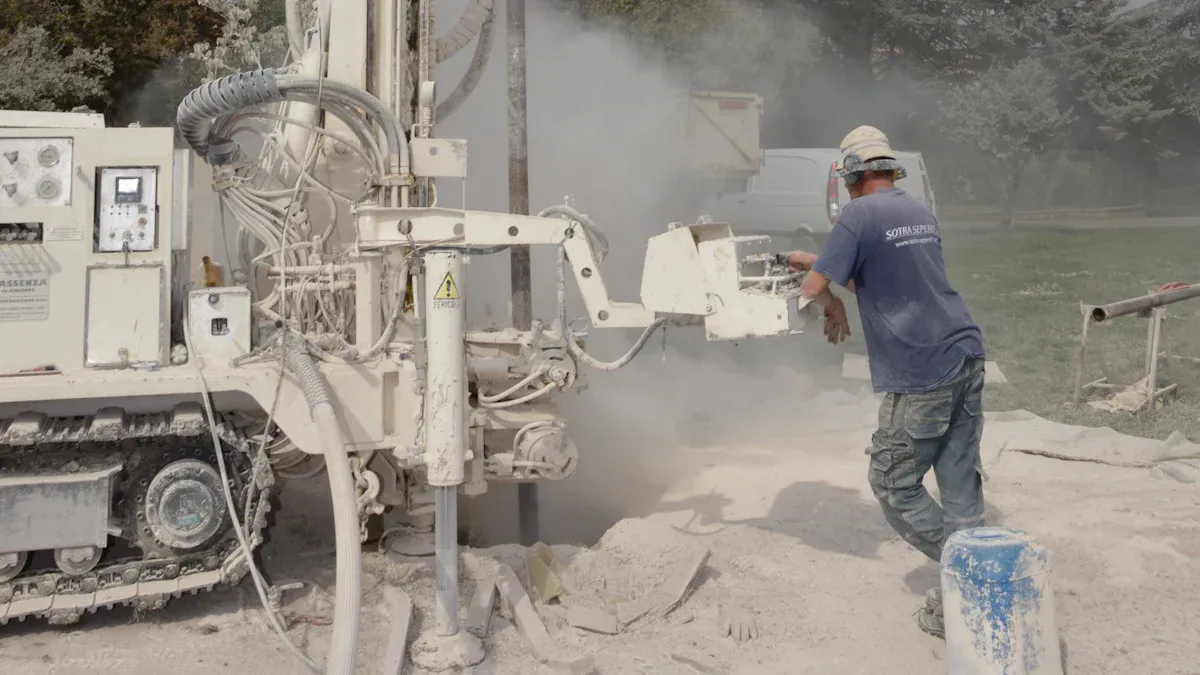
Proper Installation Techniques for Anchors
Different anchors need special ways to install them. You must follow these methods. This helps them work their best.
For screw anchors, you often need to drill first.
-
Pre-drilling is good for installation. This is in asphalt or hard clay. It is also good for rocky soil.
-
Drilling pilot holes helps you find big rocks. These are under the topsoil.
-
Anchors can move rocks. These rocks can be big. This depends on the soil type.
-
When installing anchors in asphalt, drill first. Use a masonry bit.
After you get the hole ready, install the screw anchors.
-
Put the screw into the soil. Do this at the right depth and angle. Use a drilling rig.
-
Make sure the screw's plates grab the soil. This gives a strong hold. No grout is needed.
-
Check how steady the installation is. Make changes if needed. This ensures good anchoring. This helps hold soil or keep slopes steady.
For rock anchors, grouting is very important.
-
Grouting Approaches: You use two main ways.
-
Resin Capsule Systems: These get strong fast. This happens in minutes. You put in pre-made capsules. Then you break and mix them. You do this by turning the bolt. These work for shorter bolts. They are good in dry places. Use them when you need to load fast. But they cost more.
-
Cement-Based Grouts: These are cheaper. They are for bigger installations. They are for longer bolts. Use them when fast strength is not key. Good mixers make strong grout. This grout does not bleed. It fills the space well. This makes a strong bond.
-
-
Grout Quality and Mixing Technology: Good grout needs good mixing. Modern mixing uses strong action. This breaks up cement clumps. It makes stable grout. This grout flows well. It fills the hole completely. It helps the cement get strong. This is better than old mixers. Old mixers can make bad grout.
Key installation methods for rock bolting include:
-
Drilling Accuracy: This is key for bolt position. It helps transfer load. Holes must be the right size. They need the right depth and direction. This allows good grout cover. It helps align with rock stress.
-
Drill Pattern Design: This looks at rock quality. It looks at joint spacing. It looks at hole size. It looks at stress changes. Engineers figure out spacing. They find the right length and angle. This keeps things safe. Designs often add extra bolts. This is for different rock types.
-
Quality Control: Check during installation. Make sure field conditions match plans. Ensure systems meet needs. This includes pull testing some bolts. This confirms they hold well. Also, look at grout returns. This shows complete filling. Keep records of installation details. Note rock observations. Record test results. This helps check ground support over time.
The basic installation for rock anchors includes:
-
Site preparation: Clear plants and trash. This makes it safe to work.
-
Drilling: Make holes in the rock. Do this where planned. Base this on engineering math.
-
Hole cleaning: Use air or other ways. Remove loose bits. This makes a clean, steady hole.
-
Rod insertion: Put the anchor rod in the hole. This rod might have a threaded end. It might have an expanding part. Or it might have an anchor head. This depends on the anchor type.
Proper grouting for rock anchors includes:
-
Resin and Grout Anchoring: These make a strong bond. It is between the bolt and rock. You often use them with rebar bolts. Resin anchoring uses resin capsules. These mix and harden. This happens when the bolt goes in. Grout anchoring uses cement grout. You inject it before or after the bolt. Both hold a lot of weight. They resist rust. This is good in weak rock.
-
One-Step Drilling and Grouting Anchoring: This puts grout and anchor in at once. It is good for shaky ground. Hollow bars are both anchor and drill rod. You pump grout through the middle. This happens while drilling. This makes the hole steady right away. It covers the bar completely. It makes a strong, rust-proof bond. Benefits include faster installation. It makes a better bond. It lowers the risk of hole collapse.
Installing Spin-Lock rock anchors has several key steps in installing:
-
Drilling: Use standard tools. Make a straight hole. It needs to be the right size. Drill deeper than needed. This lets debris fall. Then clean the hole with air. Make the collar area flat. It should be straight to the bolt.
-
Bolt Placement: Put the nut and washers on the bolt. Add the plate. Then push it into the hole. Push it to the right depth. If it gets stuck, use a tool. Drive it in with a hammer.
-
Setting the Anchor: Put the setting tool on the bolt end. Make sure there is space. This is between it and the nut. Turn the bolt with a wrench. This expands the anchor into the rock. Check and adjust the final tightness. Use a manual wrench. Remove the setting tool. Prepare the collar area. Use fast-setting grout.
-
Testing the Anchor Bolt:
-
Method A (Tensioning with a Test Jack): Put the jack over the bolt. Attach the test rod. Attach the test nut and plate. Pull the jack to the needed test load. This is usually half of its full strength. Do not go over its yield point. Lock in the final load. Tighten the nut. Do this until the jack gauge drops a little. Release the jack. Remove parts.
-
Method B (Tensioning by Torque Tensioning): Put the plate and washers on the bolt. Add the nut. Tighten the nut with a torque wrench. Look at charts for the right torque.
-
-
Grouting the Anchor (Down Bolting): Grout from the lowest point. Do this until grout comes out. It should be around the plate. For solid bolts, put a grout tube deep in the hole. For long solid bolts, attach the tube first. Hollow Core Rock Bolts can be grouted through their middle. Use an adapter. Grouting removes air and water. It fills cracks with cement grout.
Proper installation of ground anchors helps. It gives the stability needed. This stops drilling problems.
Tools and Equipment for Safe Installation
You need the right tools. This is for safe and good installation. For screw anchors, use special drills. Use torque wrenches. For rock anchors, you need drilling gear. You need grout mixers and pumps. You also need testing tools. Always use certified equipment. This ensures good work and safety for all anchors.
Verifying Anchor Capacity and Integrity
After installation, check the anchors. Check their strength and condition. This testing confirms they meet plans.
Hydraulic testing is a good way. It checks anchor load testing and condition. It is accurate. It can be repeated. It works for many loads. It puts force on the anchor. You use special hydraulic testing systems. You measure movement carefully. This confirms the anchor meets pull needs. It ensures no slipping or cracking. Key tools include hydraulic cylinders. They have pumps with gauges. They have digital gauges. They have threaded rods. They have reaction frames. You add load slowly. You watch movement. This is against set rules. These rules are about max load. They are about lasting movement. They are about how it bends. You can do this testing to prove it works. You can do it to see if it is suitable. Or you can do destructive testing.
Anchor bolt testing has many ways. These check quality and strength. Non-destructive testing finds flaws. It uses magnets or sound. It uses looking. It does this without hurting the bolts. Destructive testing breaks the bolt. This finds its max load testing capacity. Special services use custom cylinders. These put controlled loads. They give data on load versus movement. This checks capacity. It checks how well it holds. It checks for bending or slipping.
Here are specific testing methods:
-
Torque Testing: Use this for torque-controlled anchors. Use a calibrated torque wrench. This ensures the right torque is met. It also ensures max torque is not passed. Check the depth it is put in.
-
Proofloading / Pull Test: This puts a pulling load or torque. It confirms it is set right. It ensures the anchor can hold force. It should not bend for good. This method is common. But it might not cover all needs. This is crucial testing of ground anchors. You do this testing for both temporary anchors and permanent anchors.
-
Adhesive Anchor Testing: For chemical anchors, this checks the bond. It checks the curing. It ensures the hole was ready. It checks mixing and applying the glue. Follow the maker's guide.
You must test temporary ground anchors. Do this before first use. You also need yearly testing. Re-testing is needed after season changes. This is for all temporary anchors. For permanent ground anchors, they must work all year. You also need to test permanent anchors often.
Monitoring and Maintaining Grip Anchors
Continuous Monitoring During Drilling
You must watch your anchors as you drill. This keeps your drill rig steady. Good anchor work helps stop sudden jerks. It also lowers the chance of a stuck pipe. This is like CEGC's anti-stall system. You avoid crooked holes. You stop crossing failures. Checking your ground anchors often keeps them firm. This constant watch helps you react fast. You check how tight your ground anchors are. You check their spot. This constant watch is very important. You do this watch all the time. It keeps your work smooth. You need to watch all your anchors closely. This watching stops sudden moves. Good watching protects your gear. It also protects your team. This ongoing watching is key for safety. This careful watching saves time.
Routine Anchor Maintenance Practices
You need to care for your ground anchors often. This keeps them in great shape. Regular checks make your anchors last longer. You should look at all parts. Look for signs of wear. Look for damage. Clean your anchor bolts. Keep them free from dirt. This stops rust. Put on rust-proof coatings. These coatings protect your bolts. They shield them from bad weather. You must check and tighten bolts often. This keeps them firmly in place. It fixes any loose ones. You should have a plan for these checks. This is for both temporary anchors and permanent anchors. Good care makes sure your anchors give strong support. You must care for your temporary ground anchors. You also care for your permanent ground anchors. This regular care is key for safety. It makes sure they always work well.
Addressing Common Anchor Issues
You will find common problems with your anchors. These include getting loose and rust. You must fix these problems well. Regular care is important. You need to clean your anchor bolts. Keep them free from dirt. This stops rust. Put on protective coatings. These coatings protect your bolts. They shield them from bad places. You must check and tighten bolts often. This keeps them safe. It fixes loose parts.
Rust in anchor bolts needs quick action. You should use rust stoppers. These chemicals go right on the anchor bolt. You can also mix them with concrete. They make a shield. This stops rust-causing reactions. Act fast when you see rust. Block off the bad area. Remove loose concrete around the rusty bolt. This stops it from spreading. Remove existing rust. Use wire brushes or sand. You can also use chemicals. Make sure threads are clean. Make sure small cracks are clean. After cleaning, use a rust stopper. This stops more rust. You do regular checks. You check loads. You check for rust. This keeps the fixed area rust-free. Get help from experts if needed. Ask engineers or certified checkers. They can help you check anchor bolts. They find problems. They suggest fixes. This is true if you are not sure. This is true if you lack skill.
You can fix rust in many ways. Learn about the ground. See how much it causes rust. This helps pick good materials. It helps pick good coatings. Use two layers of rust protection. Put on two coats. Usually, use hot-dip galvanizing. Then add an epoxy coat. This is extra important in bad ground. Choose anchors that spread weight. These anchors spread loads over a bigger area. This lowers stress in one spot. It also lowers stress-caused rust. Pick anchor rods with strong ribs. These ribs help spread loads evenly. This lowers the risk of rust cracks. Seal gaps well. Do this between hollow bar joints. Make sure seals are tight. This stops water, air, and rust-makers from getting in. Regular checks and care are key for this.
Different coatings and ways to put them on fix rust. Hot-dip galvanizing dips anchor bolts in hot zinc. This makes a zinc-iron coat. It gives first protection. Epoxy coating is a second layer. It adds a shield against rust-makers. It is known for fighting chemicals. It is known for lasting long. Organic coatings, like plastic, go on by painting. They work in less bad places. For best protection, clean the surface well. Clean off grease and dirt before coating. Think about heat and wetness. Keep good conditions when putting it on. This makes sure it dries well. It makes sure it sticks. Control how thick the coat is. Watch and control it. This makes sure it protects enough. It stops problems like cracking. Do quality checks. Use regular checks. Use quality control. This meets set rules. You must test your anchors. This testing proves they are good. You need to test both temporary anchors and permanent anchors. This testing is key for safety.
Emergency Procedures for Anchor Failure
You must have clear plans for emergencies. These are for when anchors fail. Even with good watching and care, failures can happen. You need to know what to do.
-
Identify the Failure: You must quickly find which ground anchors broke. Look for sudden rig shifts. Listen for strange sounds. Do a quick visual testing of all ground anchors.
-
Stop Operations: Immediately stop all drilling. This stops more damage. It stops injuries.
-
Secure the Area: Get people out of the area right away. Set up a safe zone.
-
Assess the Situation: Figure out how bad the failure is. Is it one anchor or many ground anchors? What caused it? This check helps you plan next steps.
-
Implement Temporary Solutions: You might need to put in more temporary anchors. These temporary anchors can give quick steadiness. You might use quick fixes to hold the rig. This is a very important quick fix.
-
Plan for Repair/Replacement: Talk to engineers. They will make a plan to fix or replace. This might mean replacing broken permanent anchors. It could also mean putting in new permanent anchors. You must do full testing after any fix. This testing makes sure new or fixed anchors are safe. You need to do testing on all bad temporary anchors. You also need to do testing on all permanent anchors. This testing is very important.
-
Documentation and Review: Write down the failure. Record the cause. Record what you did. Record the results. Look at your plans again. Update them to stop future problems. These steps are key for safety.
Best Practices for Anchor Safety and Efficiency
Personnel Training and Competency
Train your team well. This makes using anchors safe. A Qualified Person has special training. They know fall protection rules. They manage the system. A Competent Person knows fall dangers. They can stop work. They check equipment. An Authorized Person sees dangers. They know how to use safety gear. They check equipment before use. Get training before facing dangers. Train users again every two years. Train them if things change. This keeps your health and safety program strong. Keep training records. This ensures good performance.
Using Certified Anchoring Equipment
Always use certified equipment. This includes all your anchors. Certified gear meets strict rules. It gives you strong support. You avoid risks with bad tools. This protects your workers. It also protects your money. Always check equipment for proper certification.
Environmental Considerations and Site Impact
Think about the environment. Hot or cold weather stresses ground anchors. Pick anchors for your expected heat. Wet air causes rust. Use coatings that stop rust. Chemicals cause damage faster. Choose anchors that resist chemicals. Rain, snow, and sun harm anchors. Pick ground anchors that resist weather. Check them often. Earthquakes stress ground anchors. Use anchors made for earthquakes. Wet dirt reduces grip. It causes more rust. Extend ground anchors below the frost line. This stops ground from lifting. Use protective coatings in bad places. This includes galvanizing or epoxy.
Case Studies of Successful Applications
Many projects show ground anchors work well. A drill rig grip anchor beats unstable terrain.
|
Project |
Application |
Performance Results |
|---|---|---|
|
1889 Alameda County Courthouse Seismic Retrofit |
Helical anchors for shear wall connections, foundation elements, and basement excavation support (47 units total) |
Seismic upgrade to current code, historic designation maintained, 30% cost savings, zero damage to historic finishes |
|
Cathedral of St. John, New York |
200 stainless steel helical stitch-ties for masonry facade stabilization |
Extended service life by 50-75 years |
|
Tribune Tower, Chicago |
Stainless steel helical stitch-ties for facade stabilization |
Extended service life by 50-75 years |
|
Union Station, Washington DC |
Stainless steel helical stitch-ties for terra cotta restoration |
Extended service life by 50-75 years |
These examples show how long anchors last. They work well when chosen right. They offer temporary and permanent fixes.
Using drill rig grip anchors is essential for your safety. A drill rig grip anchor beats unstable terrain. This is true for challenging ground conditions. You must understand ground conditions. Select the right anchors. Plan carefully for these anchors. Ensure proper installation of your anchors. Diligently perform monitoring of all anchors. This continuous monitoring of anchors prevents costly accidents. It ensures stability. Mastering these anchor techniques helps you. You can confidently tackle challenging ground conditions. It ensures secure drilling operations. This is with reliable anchors.
FAQ
Why are different types of anchors important for drilling?
Different anchors work best in different ground. You need the right kind. This keeps things steady. It makes drilling safe and fast. These anchors are very important.
How do you ensure these anchors are installed correctly?
You must use special ways to put them in. Testing shows they are strong enough. This makes sure all anchors hold well.
What is the role of geotechnical investigation in anchor planning?
This study helps you know the ground. It tells you what anchors to pick. It makes sure you choose the best ones.
Can you use the same anchors for all projects?
No. You must pick anchors for each job. Some jobs need anchors for a short time. Other jobs need anchors to stay forever.


