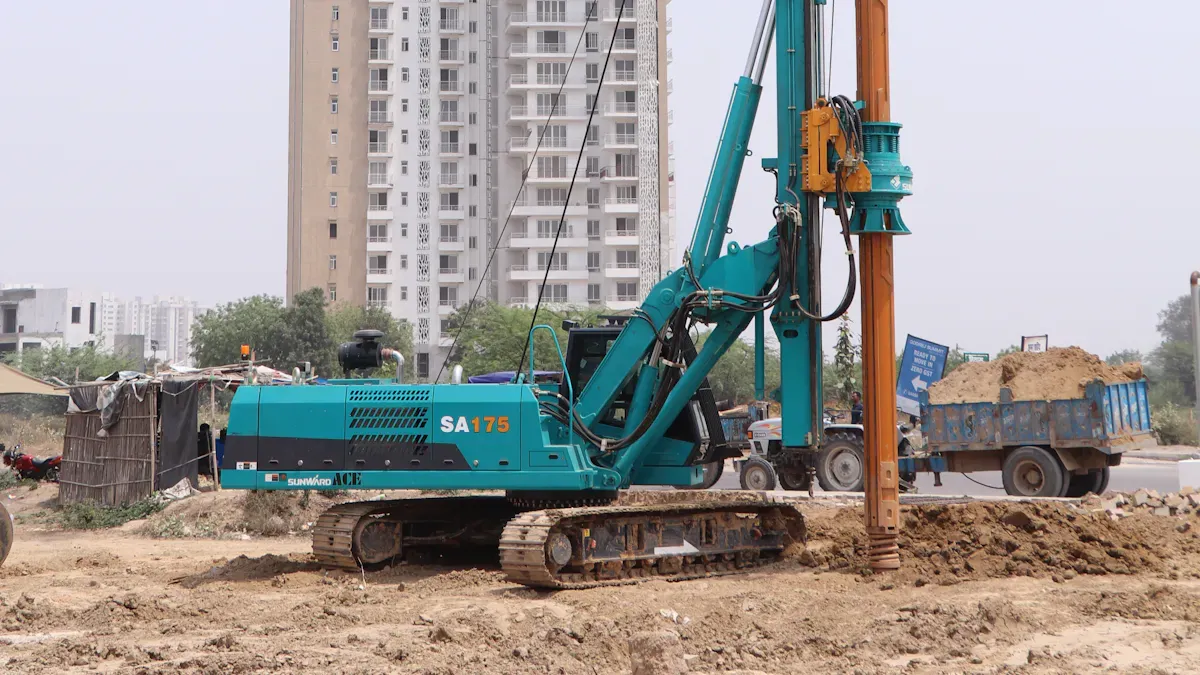
You can speed up your foundation work with the Pile Drive 2min Rate Cuts Setup Time. Imagine your crew finishing setup faster than ever before. How long does your current setup take? CEGC methods show that reducing setup time helps you save money and keeps your project on track.
Key Takeaways
-
Cut setup time to make projects run better. Check your setup times every day to find ways to get better.
-
Shorter setup time saves money and work. Using less labor means you spend less and your team can focus more.
-
Put safety first by using clear steps when setting up. Go over safety rules often to keep your crew safe.
Pile Drive 2min Rate Cuts Setup Time—Why It Matters
Project Efficiency Gains
You can boost your project speed with the Pile Drive 2min Rate Cuts Setup Time. When you set up piles faster, you finish tasks sooner. Your crew spends less time waiting for equipment. You move from one pile to the next without delay. This method helps you keep your schedule tight. Many teams use this approach to avoid bottlenecks. You see progress every hour.
Tip: Track your setup times daily. You will spot areas where you can improve.
Cost and Labor Impact
You save money when you cut setup time. The Pile Drive 2min Rate Cuts Setup Time reduces labor hours. Your workers spend less time on each pile. You lower overtime costs. You use fewer resources. This method helps you manage your budget. You can plan for fewer shifts. Your team stays focused and productive.
|
Cost Factor |
Traditional Setup |
2min Rate Setup |
|---|---|---|
|
Labor Hours |
High |
Low |
|
Equipment Usage |
Extended |
Efficient |
|
Overtime |
Frequent |
Rare |
Safety Considerations
You improve safety with faster setups. The Pile Drive 2min Rate Cuts Setup Time keeps your crew alert. You reduce the risk of accidents caused by fatigue. Your team follows clear steps. You avoid confusion on site. You create a safer work environment. You protect your workers and your project.
Note: Always review safety protocols before starting each setup.
Pile Driving Process Overview
Setup Steps
You start the pile driving process by preparing the site. You mark the pile locations and clear obstacles. Your crew checks the pile driver and makes sure all tools are ready. You align the pile vertically and position the equipment. You secure the pile in place. You follow a checklist to avoid missing steps. This routine helps you achieve the Pile Drive 2min Rate Cuts Setup Time.
Tip: Use a checklist to keep your setup organized and fast.
Waiting Time Strategies
You often face waiting periods during pile driving. You can reduce these delays by planning ahead. You schedule equipment and crew movements to avoid idle time. You keep spare parts nearby. You assign roles so everyone knows their task. You monitor progress and adjust plans quickly.
-
Keep communication clear
-
Prepare backup tools
-
Track waiting times daily
These strategies help you finish each pile faster.
Load Test Analysis
You use load tests to check pile strength and performance. You follow a step-by-step process to collect data and make decisions. The table below shows the main steps:
|
Step |
Description |
|---|---|
|
1. Preparation |
You select a test pile and set the load based on design. |
|
2. Setup |
You build the reaction system and install monitoring tools. |
|
3. Loading |
You apply load in stages and watch for settlement. |
|
4. Observation |
You record displacement, load, and time. |
|
5. Unloading |
You remove the load in steps and measure recovery. |
|
6. Analysis and Reporting |
You plot curves and decide safe working loads. |
You analyze the results to decide if you can speed up the setup. Accurate load test analysis helps you maintain quality while aiming for the Pile Drive 2min Rate Cuts Setup Time.
Installation Methods
Pitch and Drive
You use the pitch and drive method when you want to install piles one at a time. This method works best for short piles. You must pay close attention to verticality. If you do not keep the pile straight, you may see problems like forward lean. You can use this method with silent pressing machines. These machines help you keep noise low on your site.
-
You set the pile in place.
-
You check the alignment from two directions.
-
You start driving the pile into the ground.
-
You watch for any tilt or movement.
-
You adjust the pile if you see it leaning.
Tip: Use a spirit level or laser tool to check verticality before you start driving.
Pitch and drive gives you control over each pile. You can fix mistakes right away. You also finish setup quickly, which helps you reach the Pile Drive 2min Rate Cuts Setup Time.
Panel Driving
You use panel driving when you need to install several piles in a row. You connect the piles together before you start driving them. This method works well for long piles and tough ground. You get better verticality control because the piles support each other.
-
You line up the piles in a panel.
-
You connect the piles with interlocks.
-
You drive the whole panel into the ground step by step.
-
You check the alignment as you go.
Panel driving saves you time. You do not need to stop and check each pile as often. You also get a straight wall of piles. This method works best when you have many piles to install in a short time.
|
Method |
Best For |
Verticality Control |
Timing Impact |
|---|---|---|---|
|
Pitch & Drive |
Short piles |
High (individual) |
Fast for singles |
|
Panel Driving |
Long piles, tough ground |
Very high (group) |
Fast for sequences |
Note: Always check the first and last piles in the panel for alignment. This keeps the whole row straight.
Driving in Pairs
You can also drive piles in pairs. You set up two piles side by side. You drive them together. This method gives you extra stability. The piles help each other stay straight. You use this method when you want to speed up installation and keep piles vertical.
-
You place two piles next to each other.
-
You align both piles carefully.
-
You drive both piles at the same time.
-
You check for tilt after each stage.
Driving in pairs works well when you have limited space. You finish setup faster than driving one pile at a time. You also reduce the risk of piles leaning.
Tip: Assign one crew member to watch verticality during each stage. This helps you catch problems early.
You can choose the best installation method for your project. Each method helps you control verticality and save time. When you use the right method, you move closer to your project goals.
Equipment Selection
Choosing Pile Drivers
You need the right pile driver for fast setup. The best one depends on your project and site. Look at the table below to compare important things:
|
Criteria |
Description |
|---|---|
|
Soil Type |
Different soils need different equipment. Clay and sand need special care. |
|
Noise Considerations |
Hydraulic hammers are quieter than diesel hammers. This is important in cities. |
|
Project Scale |
Big projects need heavier machines for deeper piles. |
|
Site Constraints |
Small sites need machines that are easy to move. |
|
Budget Constraints |
Balance cost, speed, and downtime for the best deal. |
|
Regulatory Compliance |
Your machines must follow all local and federal rules. |
You can use wave equation analysis to pick hammer size. This helps you give enough energy but not break the pile. If your hammer is too small, you need more hits. If it is too big, you might break the pile.
Accessory Tools
You need more than just a pile driver. Extra tools help you work faster and safer. Use alignment lasers to keep piles straight. Lifting slings and shackles help move piles. Keep spare parts and backup tools ready to stop delays. A crew with the right tools can fix problems fast.
Tip: Keep your tools in a marked, neat area. This saves time when setting up.
Maintenance Checks
You must check your machines before every shift. Look for leaks, loose bolts, and worn parts. Clean the pile driver and tools after each use. Regular checks keep your machines working well. This stops breakdowns and helps you keep your fast setup rate.
-
Check hydraulic lines for leaks.
-
Make sure the hammer is lined up.
-
Test all safety switches.
A good maintenance plan keeps your crew safe and your project on time.
Troubleshooting Delays
Common Delay Sources
Delays can happen a lot during pile driving. These delays make your project take longer and cost more. Sometimes you have to wait for equipment or workers. This means people are not working and time is wasted. Load test analysis can take more time than you expect. Bad weather can stop your work. Equipment can break down and cause problems. If you do not have extra parts, you might have to wait.
Here are some common reasons for delays:
-
Waiting for equipment or crew
-
Slow load test analysis
-
Weather interruptions
-
Equipment breakdowns
-
Missing spare parts
Note: Write down delay reasons in a logbook. This helps you see patterns and fix problems faster.
Quick Solutions
You can fix delays by doing a few simple things. Make sure your crew is ready and tools are in order. Use a checklist to check you have all equipment before you start. Give each team member a clear job. Get backup tools and spare parts ready. Watch the weather and plan work when it is good. Check load test results fast by using digital tools.
|
Delay Source |
Quick Solution |
|---|---|
|
Waiting for crew |
Set clear shift schedules |
|
Equipment breakdown |
Perform daily maintenance |
|
Load test delays |
Use digital reporting |
|
Weather interruptions |
Adjust work hours |
|
Missing parts |
Keep inventory updated |
Tip: Have short meetings before each shift. This helps everyone know what to do and be ready.
You can stop delays by planning and staying organized. This helps your project move faster and reach your setup goals.
Speed & Safety Practices
Crew Coordination
You need good teamwork to keep your pile driving safe and quick. Every crew member should know their job before starting work. You can have short meetings at the start of each shift. These meetings help everyone learn the plan for the day. When you give clear jobs, you stop confusion and mistakes. Good teamwork helps you move tools and materials fast. Your team can finish piles faster when they work together.
Tip: Use hand signals or radios so everyone can talk during loud work.
Training & Communication
You make your project safer and faster when you train your crew well. You should teach every worker how to use the equipment and follow safety rules. Hold safety meetings often that talk about the machines and ways you use on your site. Make sure your team talks a lot about safety checks, equipment, and any problems they notice.
-
Teach all workers how to use equipment and stay safe.
-
Have safety meetings often about your tools and ways of working.
-
Let everyone share safety checks and worries.
When you keep your team updated, you lower accidents and keep your project moving.
Continuous Improvement
You can always find ways to work better and safer. Check your setup times and safety records after each project. Look for steps that took too long or caused trouble. Try new tools or ways that help you save time. Using mats under your machines can lower ground pressure and keep them steady. This helps you put piles in the right spot and have less downtime. When you focus on small changes, you help your team work better and stay safe.
Note: Ask your team for ideas to improve. They often see ways to work faster and safer.
You can reach the Pile Drive 2min Rate Cuts Setup Time by following these steps:
-
Track setup times daily
-
Use checklists for each task
-
Train your crew often
Try one tip today. Watch your results. Share your feedback or tips in the comments!
FAQ
How do you measure setup time for pile driving?
You use a stopwatch or timer. Start when you begin setup. Stop when the pile is ready to drive. Record the time for each pile.
What tools help you keep piles straight?
You can use a laser level, a spirit level, or guide frames. These tools help you check vertical alignment before and during driving.
Can you use the 2-minute rate for all soil types?
No, you must check soil conditions first. Hard or rocky soils may need slower rates. Always follow your engineer’s advice for safety.


